Guides · Zapier
Send a request from a Zap
A request asks one named recipient to complete a form. This guide adds a Create Request step to a Zap, prefills the recipient's name so they cannot change it, and hands the link to the next step.
Last checked
You need a formbase connection in Zapier and a published form. What a request is, and every option it takes, is in Creating requests; this guide shows where those options sit in Zapier.
1. Add the Create Request step
Start with the trigger that should send the request: a deal marked won in your CRM, a new row in Google Sheets, a scheduled date. Add an action, choose formbase, and pick Create Request.
2. Pick the form, the recipient and the delivery
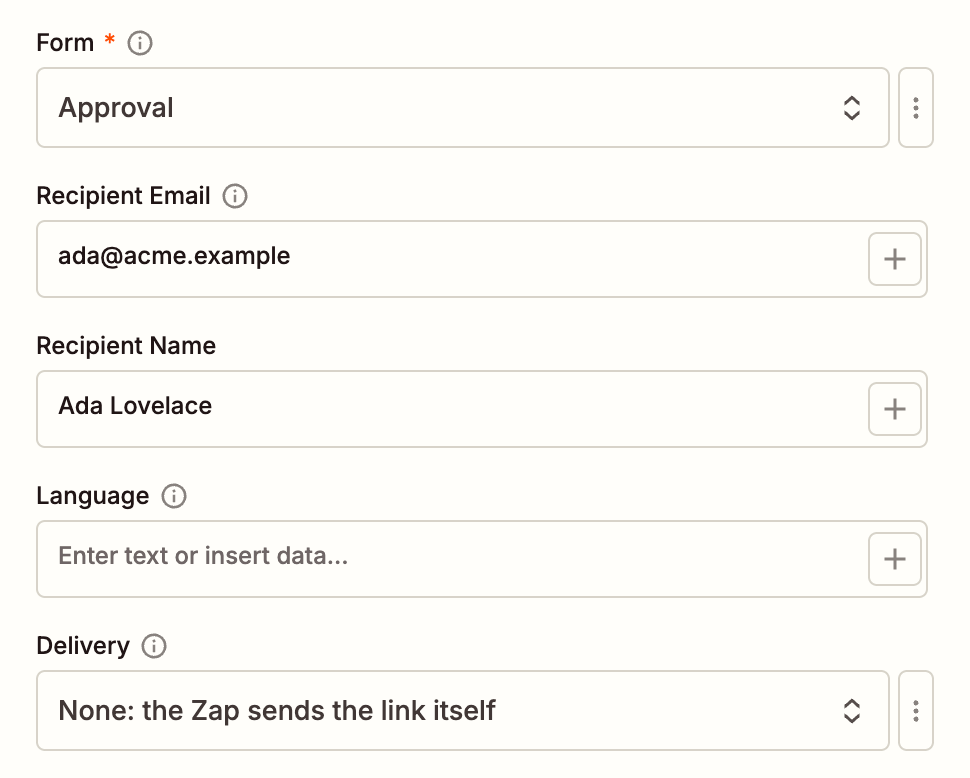
Form is the form the recipient completes. It must be published.
Recipient Email and Recipient Name usually come from the trigger. The email is needed for email delivery and for reminders.
Language is one of the form’s published languages, like
de. Leave it empty for the form’s default.Delivery decides who sends the link. Email lets formbase send the invitation and reminders, and needs a Pro or Business plan. None, the default, sends no invitation: a later step of your Zap sends the Request URL, by Slack, SMS or your own email tool. If the form has Send reminders on and you fill in Recipient Email, formbase still emails the scheduled reminders. To send none at all, leave Recipient Email empty.
3. Prefill and lock what you already know
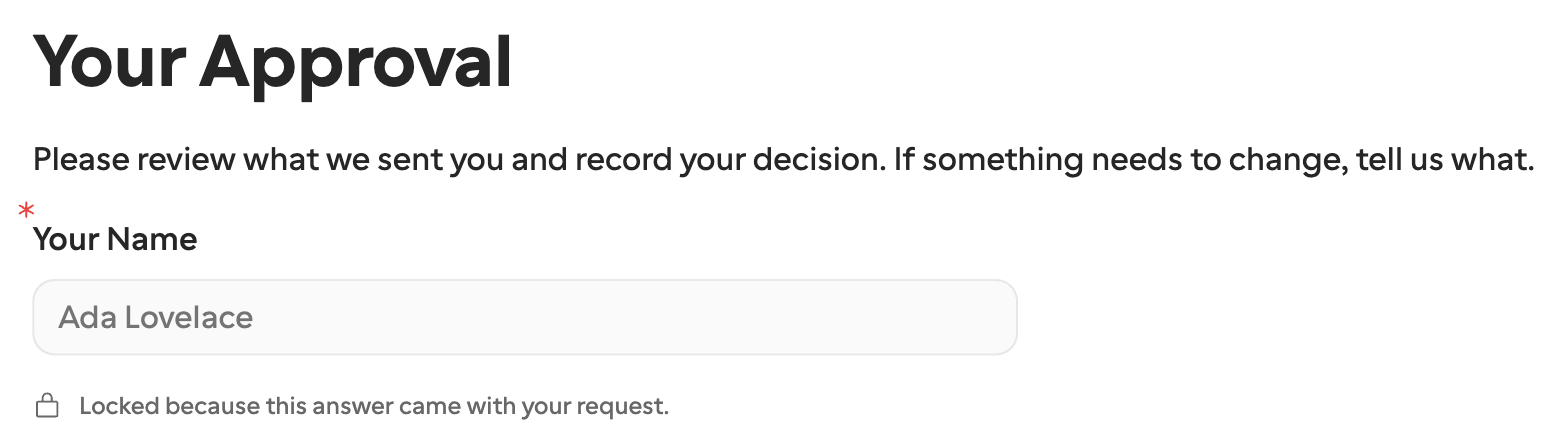
Once you pick the form, each question you can prefill appears below as a field, named after its field key. Signature, file upload, payment, appointment and calculated questions have none. Fill in any answer you already have; the recipient sees it filled in. Add a question to Read-only fields to lock it, so the recipient can see it but not change it. A locked question must also be prefilled.
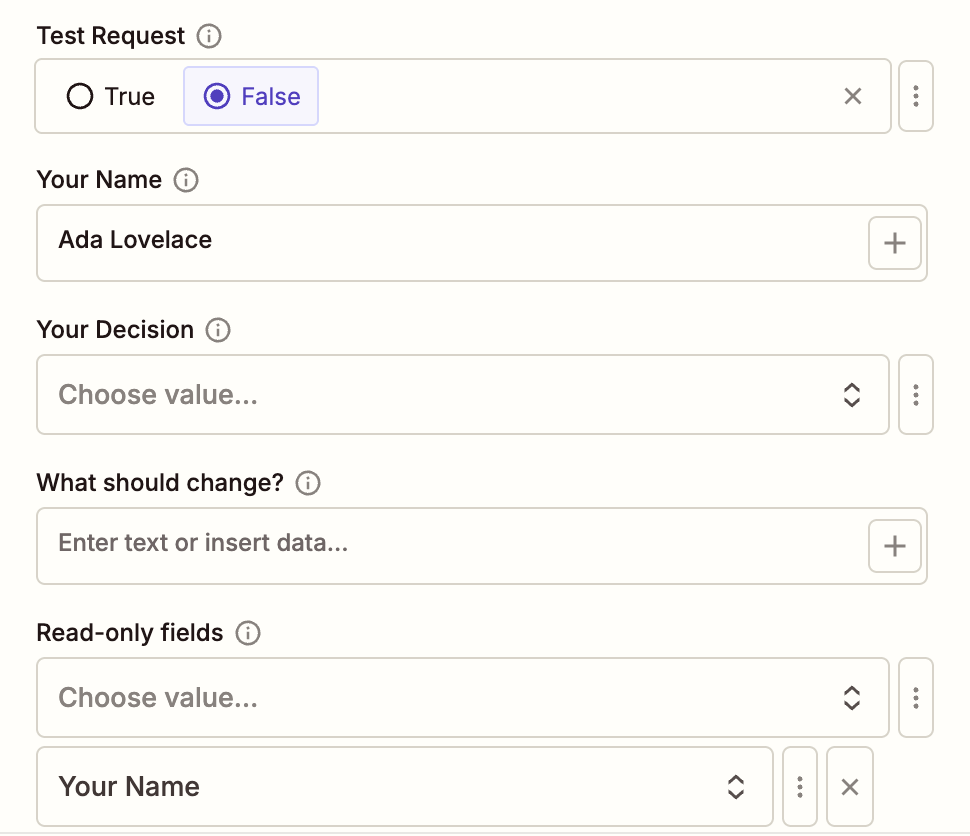
The recipient opens the link and finds their name filled in and locked:
Hidden fields of the form show up as (context) fields: the recipient cannot change them and sees them only where the form mentions them, and they come back both in the request’s Context and among the answers. If the form has a Documents block, a Documents field takes files from earlier steps. See Prefill, locked fields, and context for the difference.
4. Set an External ID
Put your own id for this piece of work in External ID, like the deal number deal-1042. It does two jobs:
A later Zap can look the request up with Find Request, without storing formbase’s request ID.
It is the idempotency key. If Zapier replays the step with the same External ID and the same inputs, you get the same request back instead of a second one. Deduplicated is then
true. The same External ID with any input changed, within 30 days, fails with Idempotency key … was already used for a different request. Use a new External ID for each request, likedeal-1042-onboarding, and a fresh one when you change a test step’s inputs, including Test Request.
Reminders, Expires At and Metadata are optional. A request expires after 30 days unless you set another date, at most 365 days away.
5. Test the step
Click Test step. formbase creates the request and returns it. Request URL is the link for the recipient; map it into the step that sends it.
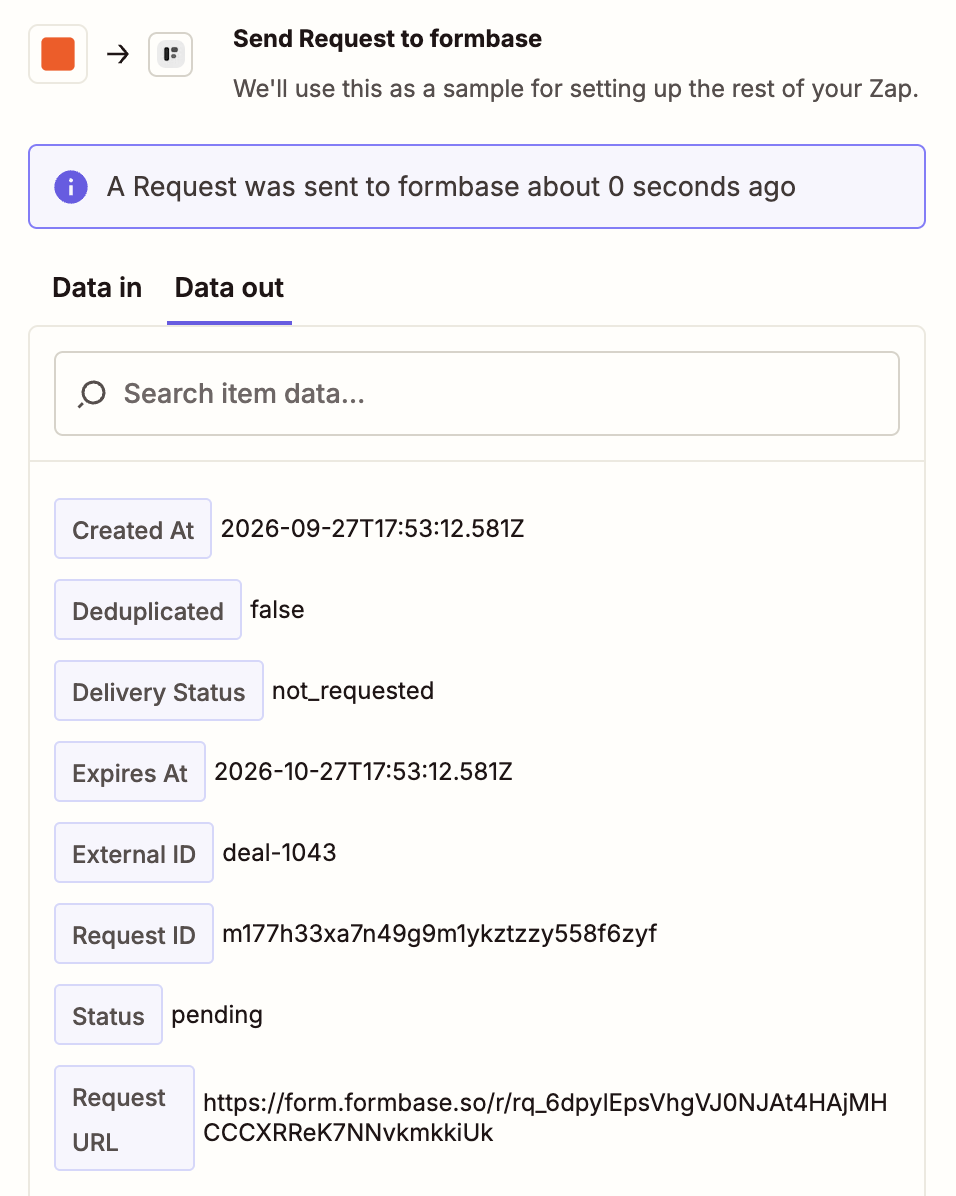
Testing the step creates a real request
Unless Test Request is on, the test is a real request: with Email delivery, the recipient gets the invitation. Turn Test Request on while you build the Zap. A test request sends no email and counts nowhere, and it does not start any Zap with a request trigger. Turn it off before you publish.