Getting Started
Send your first request
You have a published form. Now assign it to one person: their own link, with what you already know filled in. Here you make one and open it yourself, so you see both halves — what the recipient gets, and what you get back.
Works on every plan
You deliver the link yourself here, so nothing needs upgrading. Letting formbase email the invitation and chase people with reminders needs a Pro or Business plan.
Make one and open it yourself
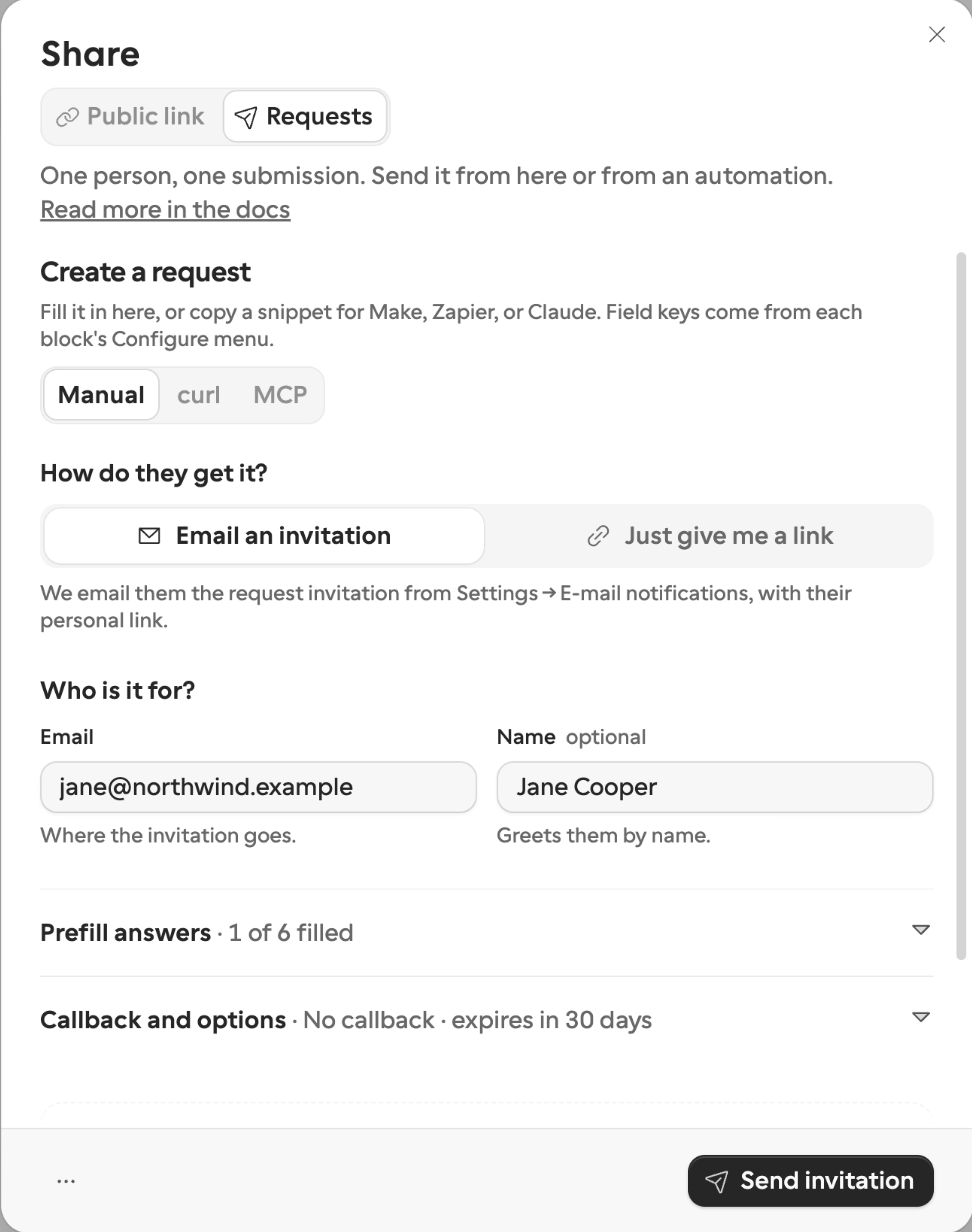
- 1
Open the Share sheet
Open the form you published and click Share in the top toolbar. An unpublished form cannot be requested, so publish first if the button is not there.
- 2
Switch to the Requests channel
Requests is the channel for one named person; Public link is for anyone with the URL. Pick Requests.
- 3
Fill in the Manual tab
Under Create a request there are three tabs. Manual is the by-hand one: Who is it for?, Prefill answers (lock any the recipient may only confirm), Hidden fields, and Callback and options. curl and MCP hand you the same request as a snippet, already written against this form's field keys.
- 4
Click Try it yourself
Under See what they will get, this turns your draft — prefill, locks, hidden fields, callback, expiry — into a test request addressed to you, and shows its link. Nothing is emailed, it spends none of your monthly allowance, and its submission never reaches the inbox, the counts, exports, or your integrations.
What the recipient sees
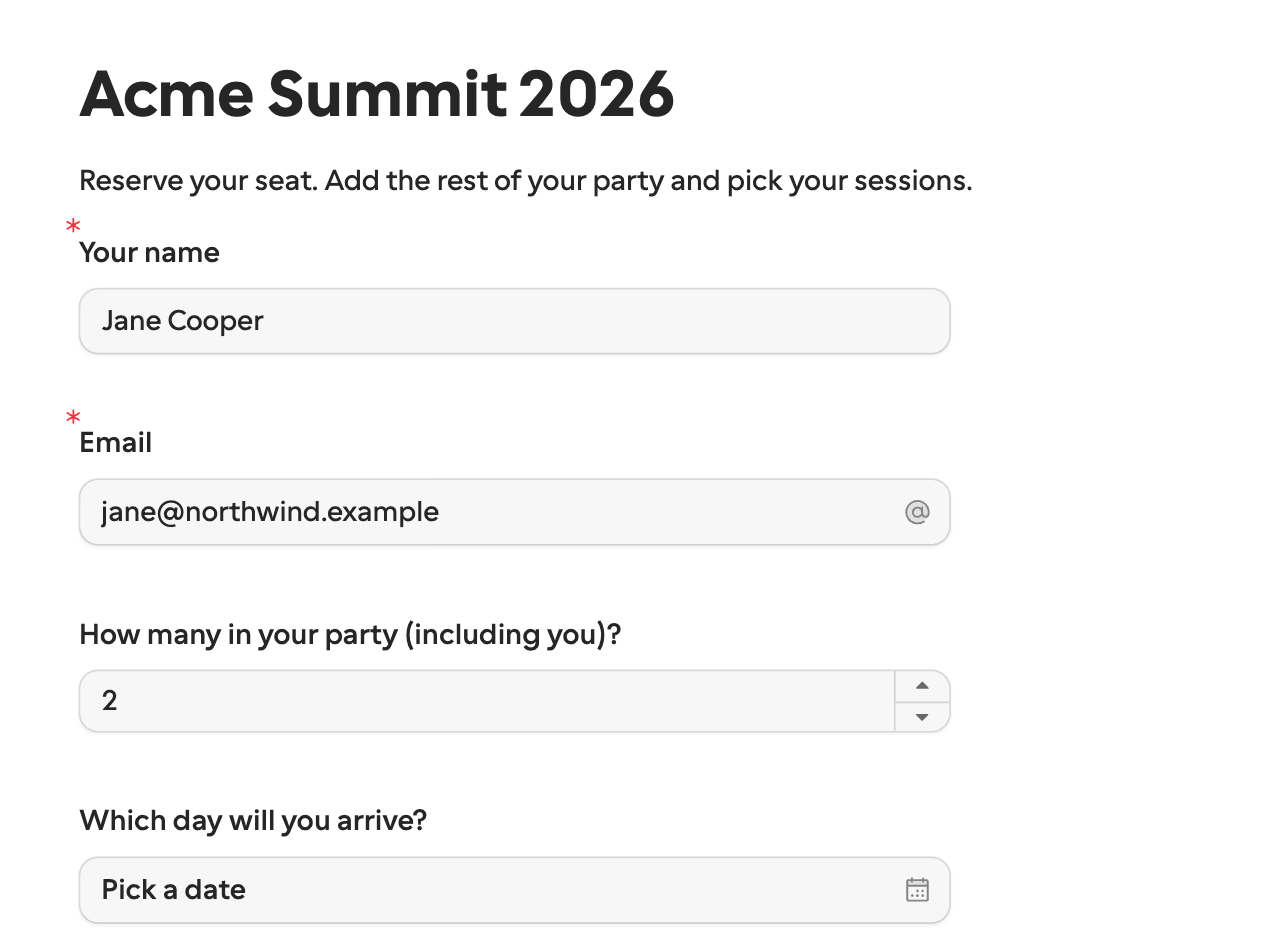
Open the test link in a new tab and answer the form as your recipient would. It is the form you authored — your theme, your logo, your language — with no captcha and no sign-in. When you submit, you get your thank-you page.
Open the same link again afterwards. Instead of a blank form you get the outcome page — your thank-you page again, or You have already submitted, under the same cover and logo. A request is answered once, by one person, and the link says so rather than quietly collecting a second response. Expired and canceled requests show a short notice there instead.
Find it on the Requests page
Click Requests in the sidebar, between Forms and Trash. This is every request in the workspace, across every form. Open Filter and tick Show test requests to see the one you just made — test requests are hidden by default and carry a Test badge.
Click a request to open its drawer. It answers two questions:
| You want to know | Drawer section |
|---|---|
| What did we send them? | Prefilled for them — every value supplied, by field key, with locked ones marked. |
| What has happened since? | Timeline — created, invitation delivered, reminders, opened, started answering, completed, and every callback attempt. |
From here you can copy the request link, cancel the request, send a reminder (Pro), or replay a callback. A request expires 30 days after it is created unless you set your own Expires in (days), between 1 and 365. The Requests page →
What you left out
Doing it by hand is the whole loop in miniature. When a workflow creates the request instead, three things join in — and they are the reason requests exist:
Prefill and context. Send what you already know, so the recipient confirms instead of retyping. Lock the values they are only confirming, and attach your case id where they cannot change it. Prefill, locked fields, and context →
A callback. The moment they finish, formbase POSTs a signed payload to your endpoint with the answers keyed by field key, and your run continues. Expiry and cancellation fire it too, so nothing hangs. Callbacks & signing →
Delivery and chasing. On Pro and Business, formbase emails the invitation from your own domain and sends the reminders on your schedule. Invitations & reminders →
Same thing from your own code
The curl and MCP tabs on that same card are not a different feature — they run exactly what the Manual tab runs. Copy one, swap the recipient, and you have automated the step. Creating a request →