Guides · n8n (self-hosted)
Send a request from an n8n workflow
A request asks one named recipient to complete a form. This guide adds a Create request node to a workflow, prefills the supplier's company name so they cannot change it, and hands the link to the next node.
Last checked
You need a formbase credential in n8n and a published form. What a request is, and every option it takes, is in Creating requests; this guide shows where those options sit in n8n.
1. Add the Create request node
Start with the trigger that should send the request: a new row in a sheet, a deal marked won in your CRM, a schedule. This guide uses a
manual trigger and an Edit Fields node named Supplier that holds supplier_id,
company_name and contact_email. Click + after it, search for formbase, and
pick Create request.
2. Pick the form and the recipient
![The Create request node: input from Supplier on the left; Form [Guide] Supplier onboarding, Recipient Email {{ $json.contact_email }}, and Values to Send with company_name and contact_email mapped from the input; on the right the output with deduplicated true, deliveryStatus not_requested, externalId supplier-SUP-1042, status pending and a url on form.formbase.so](/guides/n8n/n8n-create-request.png)
Form is the form the recipient completes. Pick it from the list, or switch to ID and paste its ID. It must be published.
Recipient Email usually comes from the input, like
{{ $json.contact_email }}. It is needed for email delivery and for reminders.
3. Prefill and lock what you already know
Once you pick the form, Values to Send lists every question you can prefill by its title and field key, like Company name (company_name). File upload, signature, payment and schedule appointment questions, calculated fields and Documents blocks are not listed: the recipient or the form supplies those. Map the answers you already have; fields left empty are not sent. The recipient sees the mapped ones filled in.
Mapping Column Mode can also be Map Automatically: then every input field named after a field key of the form is sent. That suits an input you shaped for this form with an Edit Fields node.
Hidden fields of the form are listed too, marked · context. The recipient cannot change them and sees them only where the form mentions them. See Prefill, locked fields, and context for the difference.
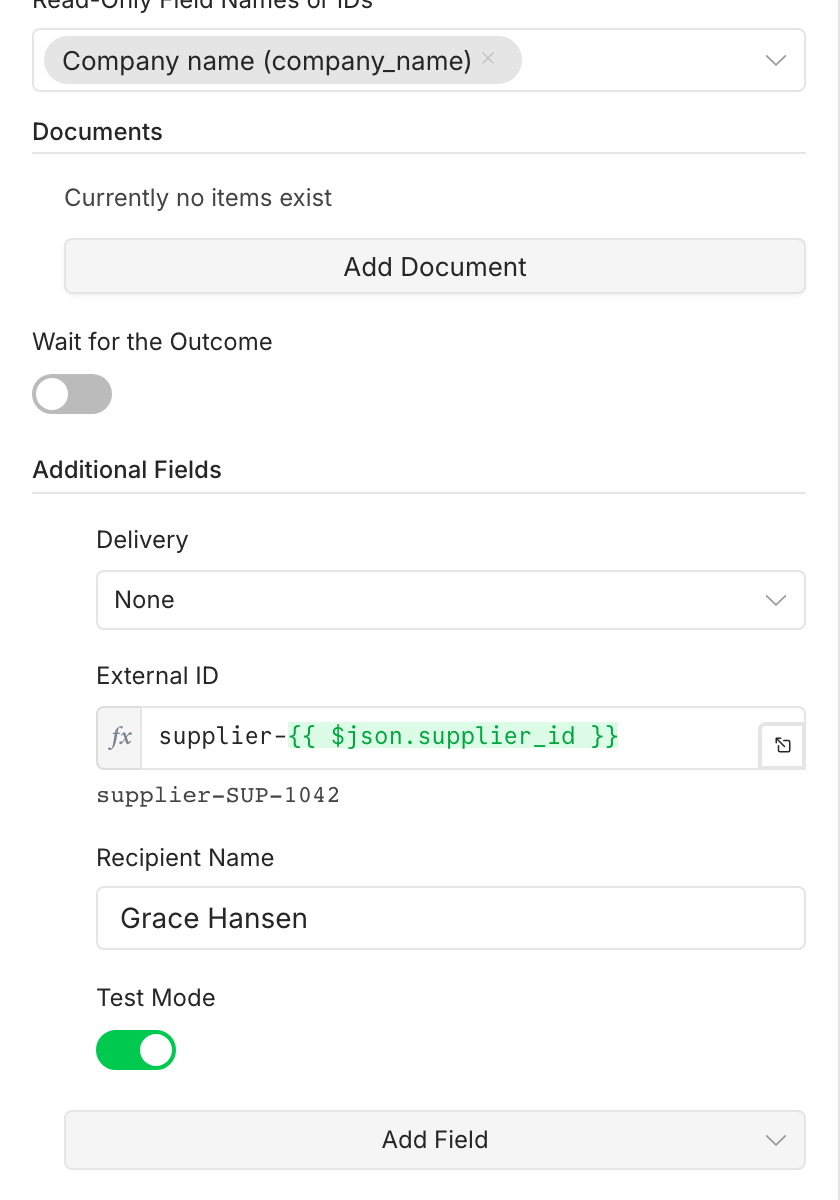
Pick a question under Read-Only Field Names or IDs to lock it, so the recipient can see it but not change it. A locked question must also be prefilled. If the form has a Documents block, Documents takes files from a binary field of the input item.
4. Add the options you need
Click Add Field under Additional Fields:
Delivery decides who sends the link. Email the Invitation lets formbase send the invitation and reminders, and needs a Pro or Business plan. None, the default, sends no invitation: a later node sends the request’s
url, by Slack, SMS or your own email tool.Reminders left out follows the form’s reminder schedule. With a Recipient Email, those reminders are emailed even when Delivery is None. Add Reminders and leave it empty to send none, or enter a schedule like
2d, 5d, which needs Pro or Business.External ID is your own ID for this piece of work, like
supplier-{{ $json.supplier_id }}. A later workflow can find the request by it. It is also the idempotency key: run the node again with the same External ID and the same parameters, and you get the same request back withdeduplicated: true, not a second one. Within 30 days, the same External ID with any parameter changed, Test Mode included, fails with CONFLICT: Idempotency key … was already used for a different request.Test Mode creates a test request: nothing is emailed and it counts nowhere.
Recipient Name, Language, Expires At and Metadata are optional. A request expires after 30 days unless you set another date, at most 365 days away.
Callback URL sends the outcome to a URL of your own. To get the outcome back into this workflow, turn on Wait for the Outcome instead.
5. Run the node
Click Execute step. formbase creates the request and returns it: id, status
pending, and url, the link for the recipient. Map {{ $json.url }} into the node that sends it.
deliveryStatus is not_requested when Delivery is None, because formbase sent nothing.
Running the node creates a real request
Unless Test Mode is on, every run, including Execute step in the editor, is a real request: with email delivery the recipient gets the invitation. Turn Test Mode on while you build the workflow. A test request does not start any workflow with a request trigger. Before you publish, turn Test Mode off and change the External ID, because the old one belongs to the test request.